Showing posts with label May Arts Ribbon. Show all posts

Tuesday, November 1, 2016

Creative Scrappers -Sketch #300

Hi and welcome to my blog !
So very happy to have been included on the Creative Scrappers team again !!!
This term Kristine has asked me to create two cards per month with the sketch.
It's really simple to convert layout sketches into cards.....just think smaller and without photos !

Sketch #300 


Hello my favorite friend
Supplies are from Fancy Pants Designs,Simple Stories,My Mind's Eye


I used the sketch pretty much as is for this card.


Love you
Supplies are from Lawn Fawn and Simple Stories


For this card I created a grid pattern with white cardstock and stitched it on wood grain pattern paper.

Thank you so much for the visit, I hope I have inspired  you to try using Creative Scrappers sketches to make handmade cards .
xo


Tuesday, October 18, 2016

It's been a long time

Holy cow, I have some serious catching up to do !!!!! This poor blog has been neglected :(
I'm going to start sharing more , I promise.

These are a few cards I've created with the new Echo Park -Christmas Delivery collection !!


Jingle all the way
Love that little truck :)


Here's a close up.

Joy

The wreath was made with a Spellbinders die.

In other news...... I'm going to be creating cards for my friend Kristine at Creative Scrappers !!!
(starting in November )


Thanks so much for stopping by today, have a great day !


Friday, December 4, 2015

Joyeux Noel Festive Door Ornament

Happy Holidays and welcome to The Ribbon Resource Blog Hop !
Today I am sharing this festive door ornament..


May Arts Ribbons supplies used:
Kraft Decorative Tags- 1 large tag

Other supplies:
Patterned Paper
Small oval chalkboard clip
Decoupage glue
Glue
Evergreens,twigs,berries and lantern


Step 1: Dip red paper cord in decoupage glue.


Step 2: Shape cord into letters, let dry.


Step 3: Prepare tag , as shown. Glue letters to tag.


Step 4: Tie evergreen ,twigs and berry branches with wire, form a loop at the top for hanging.


Step 5: Tie large bow at top of branches, attach tag with clip and lantern with more wire.

The prize for this hop is 2 to 5 yards of Christmas ribbon :)


Here's a list of the other designer's blog to visit for more inspiration !!!
Thanks for visiting.
Happy Crafting !


Friday, November 27, 2015

Christmas place setting holder

Hello and welcome to the Ribbon Resource blog hop.
Today we are sharing budget friendly holiday projects.
I chose to make these simple festive place setting holders for my Christmas brunch !


May Arts Ribbon supplies used:
2.5 inch Snowflake Print Cotton Ribbon- 14 inches
Red Burlap String- 1.5 yards

Other Supplies:
Ivory felt
Snowflake dies ( Spellbinders)
Ivory and kraft cardstock
Small ivory pearls
White gel pen

Instructions:

Step 1-Cut a 3"X 7" piece of ivory felt and a 14 inch piece of Snowflake Print ribbon.

Step 2- Turn 1/2 " seam at bottom of ribbon, machine stitch and turn top of ribbon 3 ".

Step 3- Pin ribbon to felt and machine stitch together.

Step 4- Cut and emboss 2 snowflakes in ivory cardstock, Attach snowflakes with red burlap string, tie bow. Add small pearl embellishments.

Step 5- Make small tag from kraft paper, write name with white gel marker and machine stitch into place, as shown.
Here's a close up of the holder opening.
That's it for me today.....now to find time to make 10 more of these !!!

Please make sure to visit my fellow designers during the hop for a chance to win some gorgeous ribbons from the Ribbon Resource !!!
Here's a list of blog to visit during this blog hop:


Thanks for visiting .
Happy Crafting !!!


Wednesday, November 4, 2015

DCWV+The Ribbon Resource Christmas Craft Ideas !! DAY 4

Hello and welcome to day 4 of the Ribbon Resource and DCWV blog hop.
Today I'm going to share the Advent Calendar I created with the Merry Memories Stack from DCWV and pretty ribbons and twines from May Arts Ribbon (The Ribbon Resource).


Christmas Advent Calendar
I created small 'seed packets" with most of the beautiful papers in the stack for my Advent calendar and attached them on paper cording ( stapled behind a large wood frame) with small clothespins.
Packets are 3 X 4 1/2.

I left a small loop of twine in the back to use to attach packets with clothespins.


Supplies Used:
DCVW-Merry Memories Stack

Thanks so much for visiting !!
Make sure to leave comments on the Ribbon Resource and DCWV blogs for a chance to win a great prize pack !!!


Tuesday, November 3, 2015

Catching up !!!

Catching up on a few projects I've created with Spellbinders and May Arts Ribbon supplies.


Love this ribbon with velvet polka dots !

A Fall themed hostess gift set created with Labels 48 die set.
Thanks for visiting today :)


Wednesday, September 9, 2015

Perfect Photo Op

Hello,hello !
I have this layout up on the Spellbinders blog today.
It features the Basic Squares die set from the Sapphire collection.

Paper supplies are from Heidi Swapp, Pebbles and My Mind's Eye .

Thanks for visiting !
Hugs,


Friday, August 21, 2015

Prima Ribonista !

The new May Arts Ribbon Design Team was announced today and my name is on it !!!
I'm so happy for the new challenge, it's going to be a fun year of creativity :)

Here's one of the cards I created with some of the burlap twine and ribbon.

Thinking of you
Thanks for visiting today !
Hope you are all having a great summer :)


Sunday, July 12, 2015

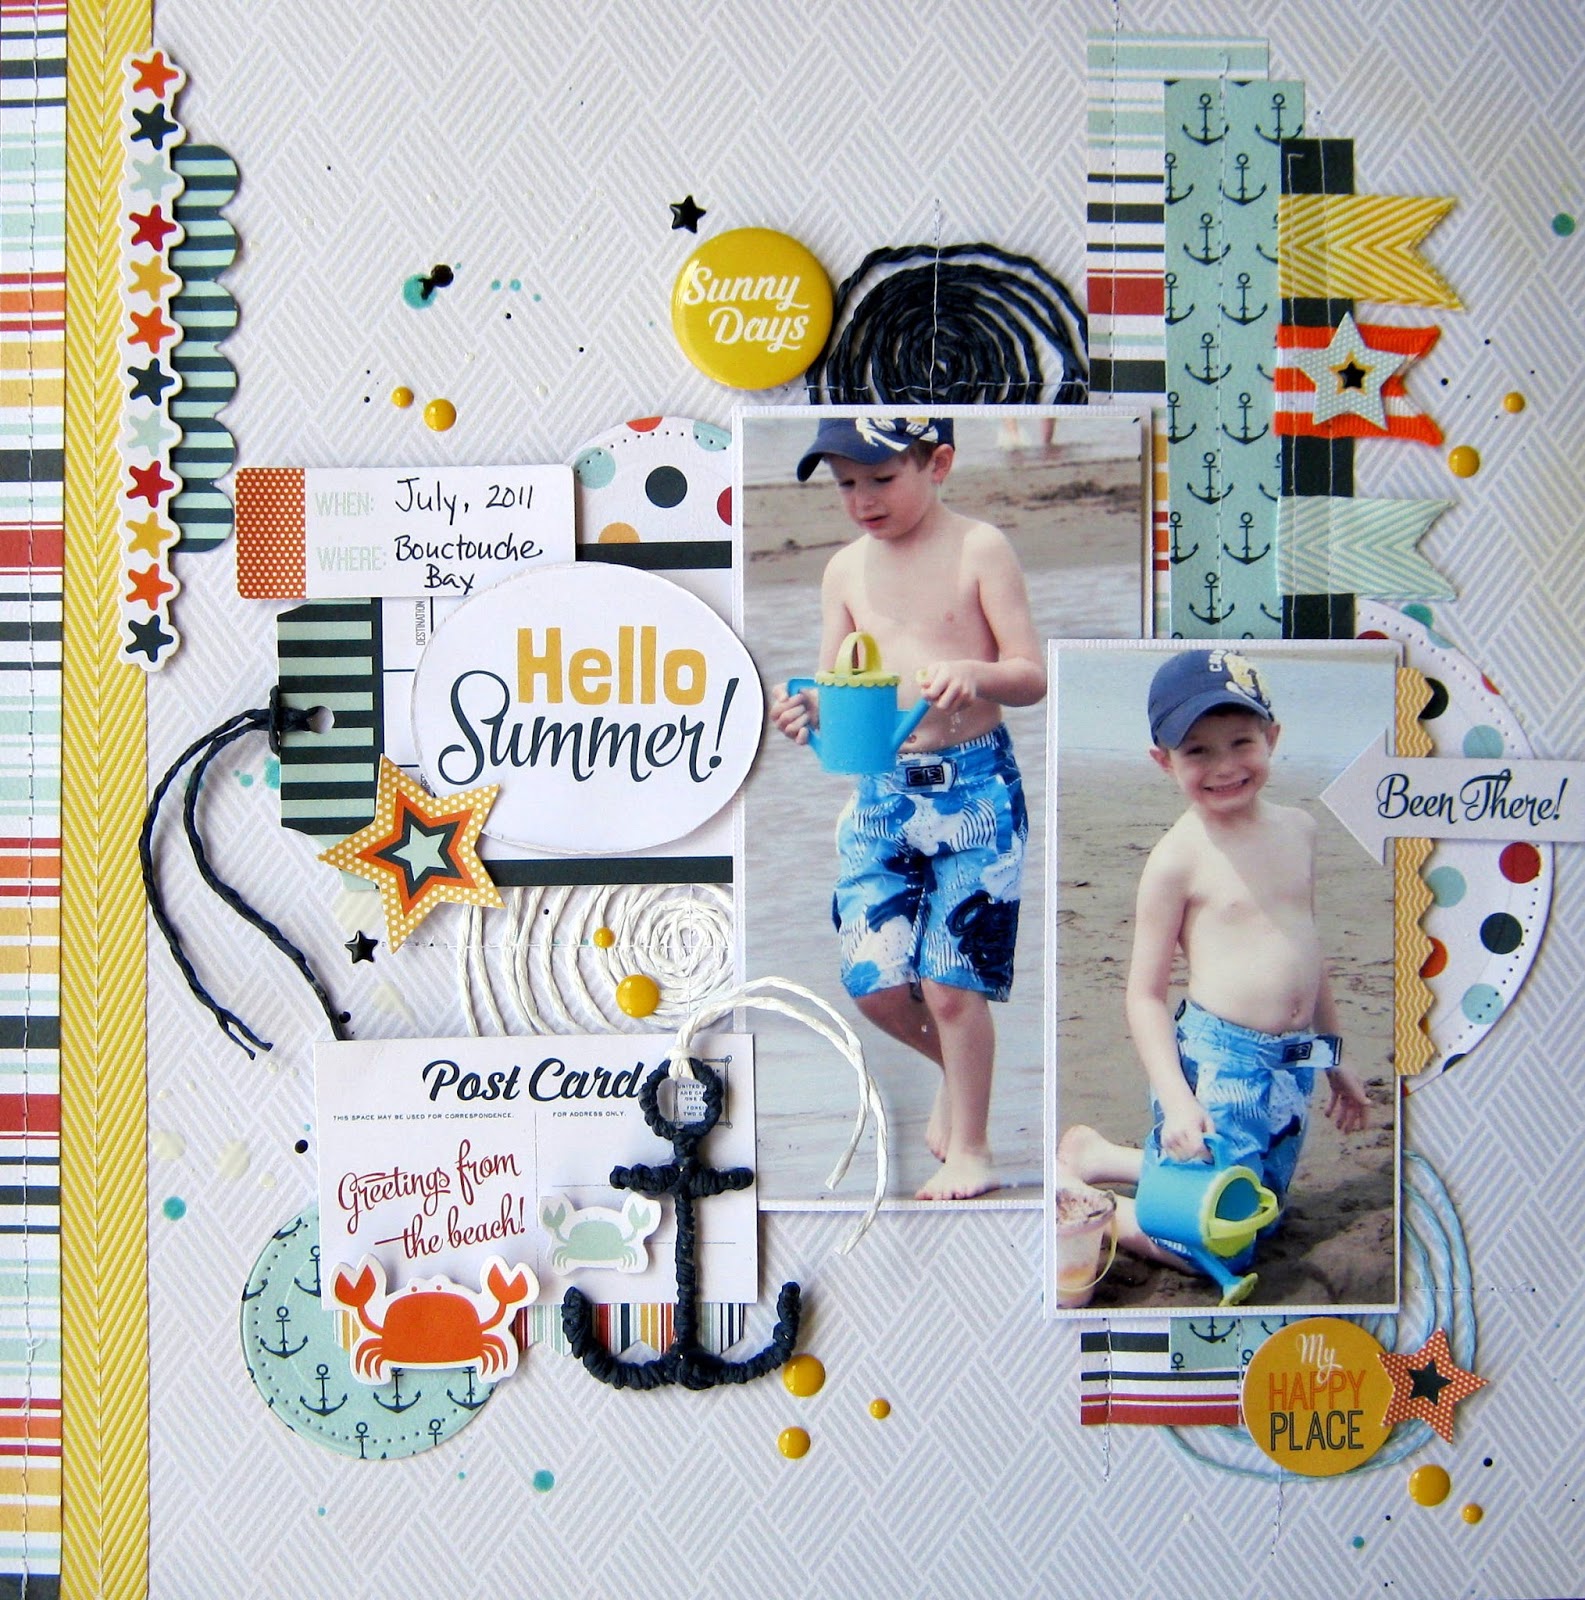
Hello Summer !

Hello and welcome to my blog. I hope you are all having a great summer so far, we just got back from camping and the weather was perfect !!
Today I am sharing a layout I created as a finalist for the May Arts Ribbon design team call. I'd love to be one of the new  Prima Ribbonista ! Fingers crossed :)


Hello Summer !

Supplies for this layout are from Fancy Pants Designs (Making Waves collection), May Arts Ribbon, Spellbinders and My Mind's Eye.

Here's a look at how I created this Summer themed layout.


Step 1- Create an anchor with wire and pliers.


Step 2- Wrap navy paper cord from May Arts Ribbon adding bits of glue to hold into place.


Step 3- Attach a small piece of white paper cord on the loop of the anchor.


Step 4- I love adding texture to background paper and for this project I decided to add spirals of paper cord in light blue, navy and white. I love how malleable this cord is.


Step 5- Machine stitch into place, if desired.


Step 6- Trim 3 various pieces of ribbon 2 inches long, adhere behind narrow strip of navy paper. 
For this project, I used 3/4" Twill/Chevron in yellow and light blue and 7/8" Grosgrain horizontal stripes ribbon in orange.


Step 7- Fold ribbons over and trim off into points to create flags. Machine stitch the small flags into place.


Step 8- Adhere/machine stitch a 12" piece of yellow chevron ribbon on the left side of layout ,adding a strip of striped paper and a star cardstock die piece on each side.


Here's a close up of that hand crafted anchor :)


and a close up of the small flags.


 I hope you've enjoyed today's tutorial.
As always, thanks for visiting.....wish me luck !
xo


Wednesday, July 8, 2015

Congratulations

Happy Wednesday!
Just a quick share today of a card I created for the Spellbinders blog using the Label Forty Two die sets. The instructions are posted on the blog.
I love how all of these different sets go together....the design possibilities are almost endless!

Congratulations


Spellbinders dies used:
Classic Squares Large
Labels Forty Two
Labels Forty Two Decorative Elements
Labels Forty Two Decorative Accents

Thanks for visiting !
xo